

Appium is an open-source automation framework designed for testing mobile applications. It supports native, hybrid, and mobile web apps across both iOS and Android platforms. With cross-platform compatibility, support for multiple programming languages, and real device interaction, Appium stands out as a flexible and powerful tool for mobile test automation.
In this guide, we’ll walk through the steps to integrate Appium with Qase using the Qase TestNG reporter. By the end, you’ll be able to streamline your test reporting and gain better visibility into your test runs. This walkthrough assumes you're already familiar with Appium and working with a language like Java.
Qase Appium Integration
Qase offers a REST API that makes it easy to integrate with a variety of testing tools and frameworks—including TestNG, JUnit, Cucumber, Playwright, Cypress, Pytest, and Robot Framework. You can find more integrations and reporters on Qase’s GitHub page.
Getting Started
We’re aiming to configure the project so test results are sent to Qase automatically, with screenshots attached for any failed tests.
We’ll go through the following steps:
- Set up dependencies
- Generate a Qase API token and create a Qase projects
- Configure the reporter to send test results to Qase
If you don’t have a project set up yet, no worries! We’ve prepared a example repository with a basic mobile testing setup. You can clone it and run it as-is, or use it as a reference as you work through the integration steps.
Dependecies: Add the Qase TestNG Reporter
Appium clients like Java and Python are the most commonly used. In this guide, we’ll focus on Java with TestNG as the test runner. Qase also supports reporters for tools like WebDriverIO and Robot Framework.
To add the Qase TestNG reporter to your project, follow the instructions here:
👉 Install Qase TestNG Reporter
Note: If you haven't already, ensure to set the variablesANDROID_HOMEandANDROID_SDK_ROOTin your shell. Here's a command that works for Linux and macOS:
echo -e '\nexport ANDROID_HOME=$HOME/Library/Android/sdk\nexport ANDROID_SDK_ROOT=$HOME/Library/Android/sdk' >> ~/.zshrc && source ~/.zshrcDependencies: Install Appium and add utility files
Make sure you have Node.js installed on your system. To install Appium globally, run: npm install -g appium
You can verify that Appium was installed correctly by checking its version: appium -v
Next, install the Appium Android driver (uiautomator2) with: appium driver install uiautomator2
To confirm the driver is installed, use: appium driver list --installed
We’ll add three utility classes to help manage the Appium server, the driver, and test attachments:
- AppiumServerManager: Starts and stops the Appium server programmatically, using predefined environment settings and logs. This automates setup, helpful in CI environments.
- CustomAppiumDriverManager: Manages a thread-safe AppiumDriver instance for Android, handling capabilities and driver lifecycle for cleaner, parallel-friendly test execution.
- AttachManager: Connects with Qase during test execution. If a test fails, it captures a screenshot using the Appium driver and attaches it to the test result.
Go ahead and copy the necessary code into the this directory - src/test/java/your/project/utils.
Set Up Android Studio
Download the latest version of Android Studio from developer.android.com.
Next, download the sample APK: ApiDemos-debug.apk and save it to the <project-root>/apps directory of your project.
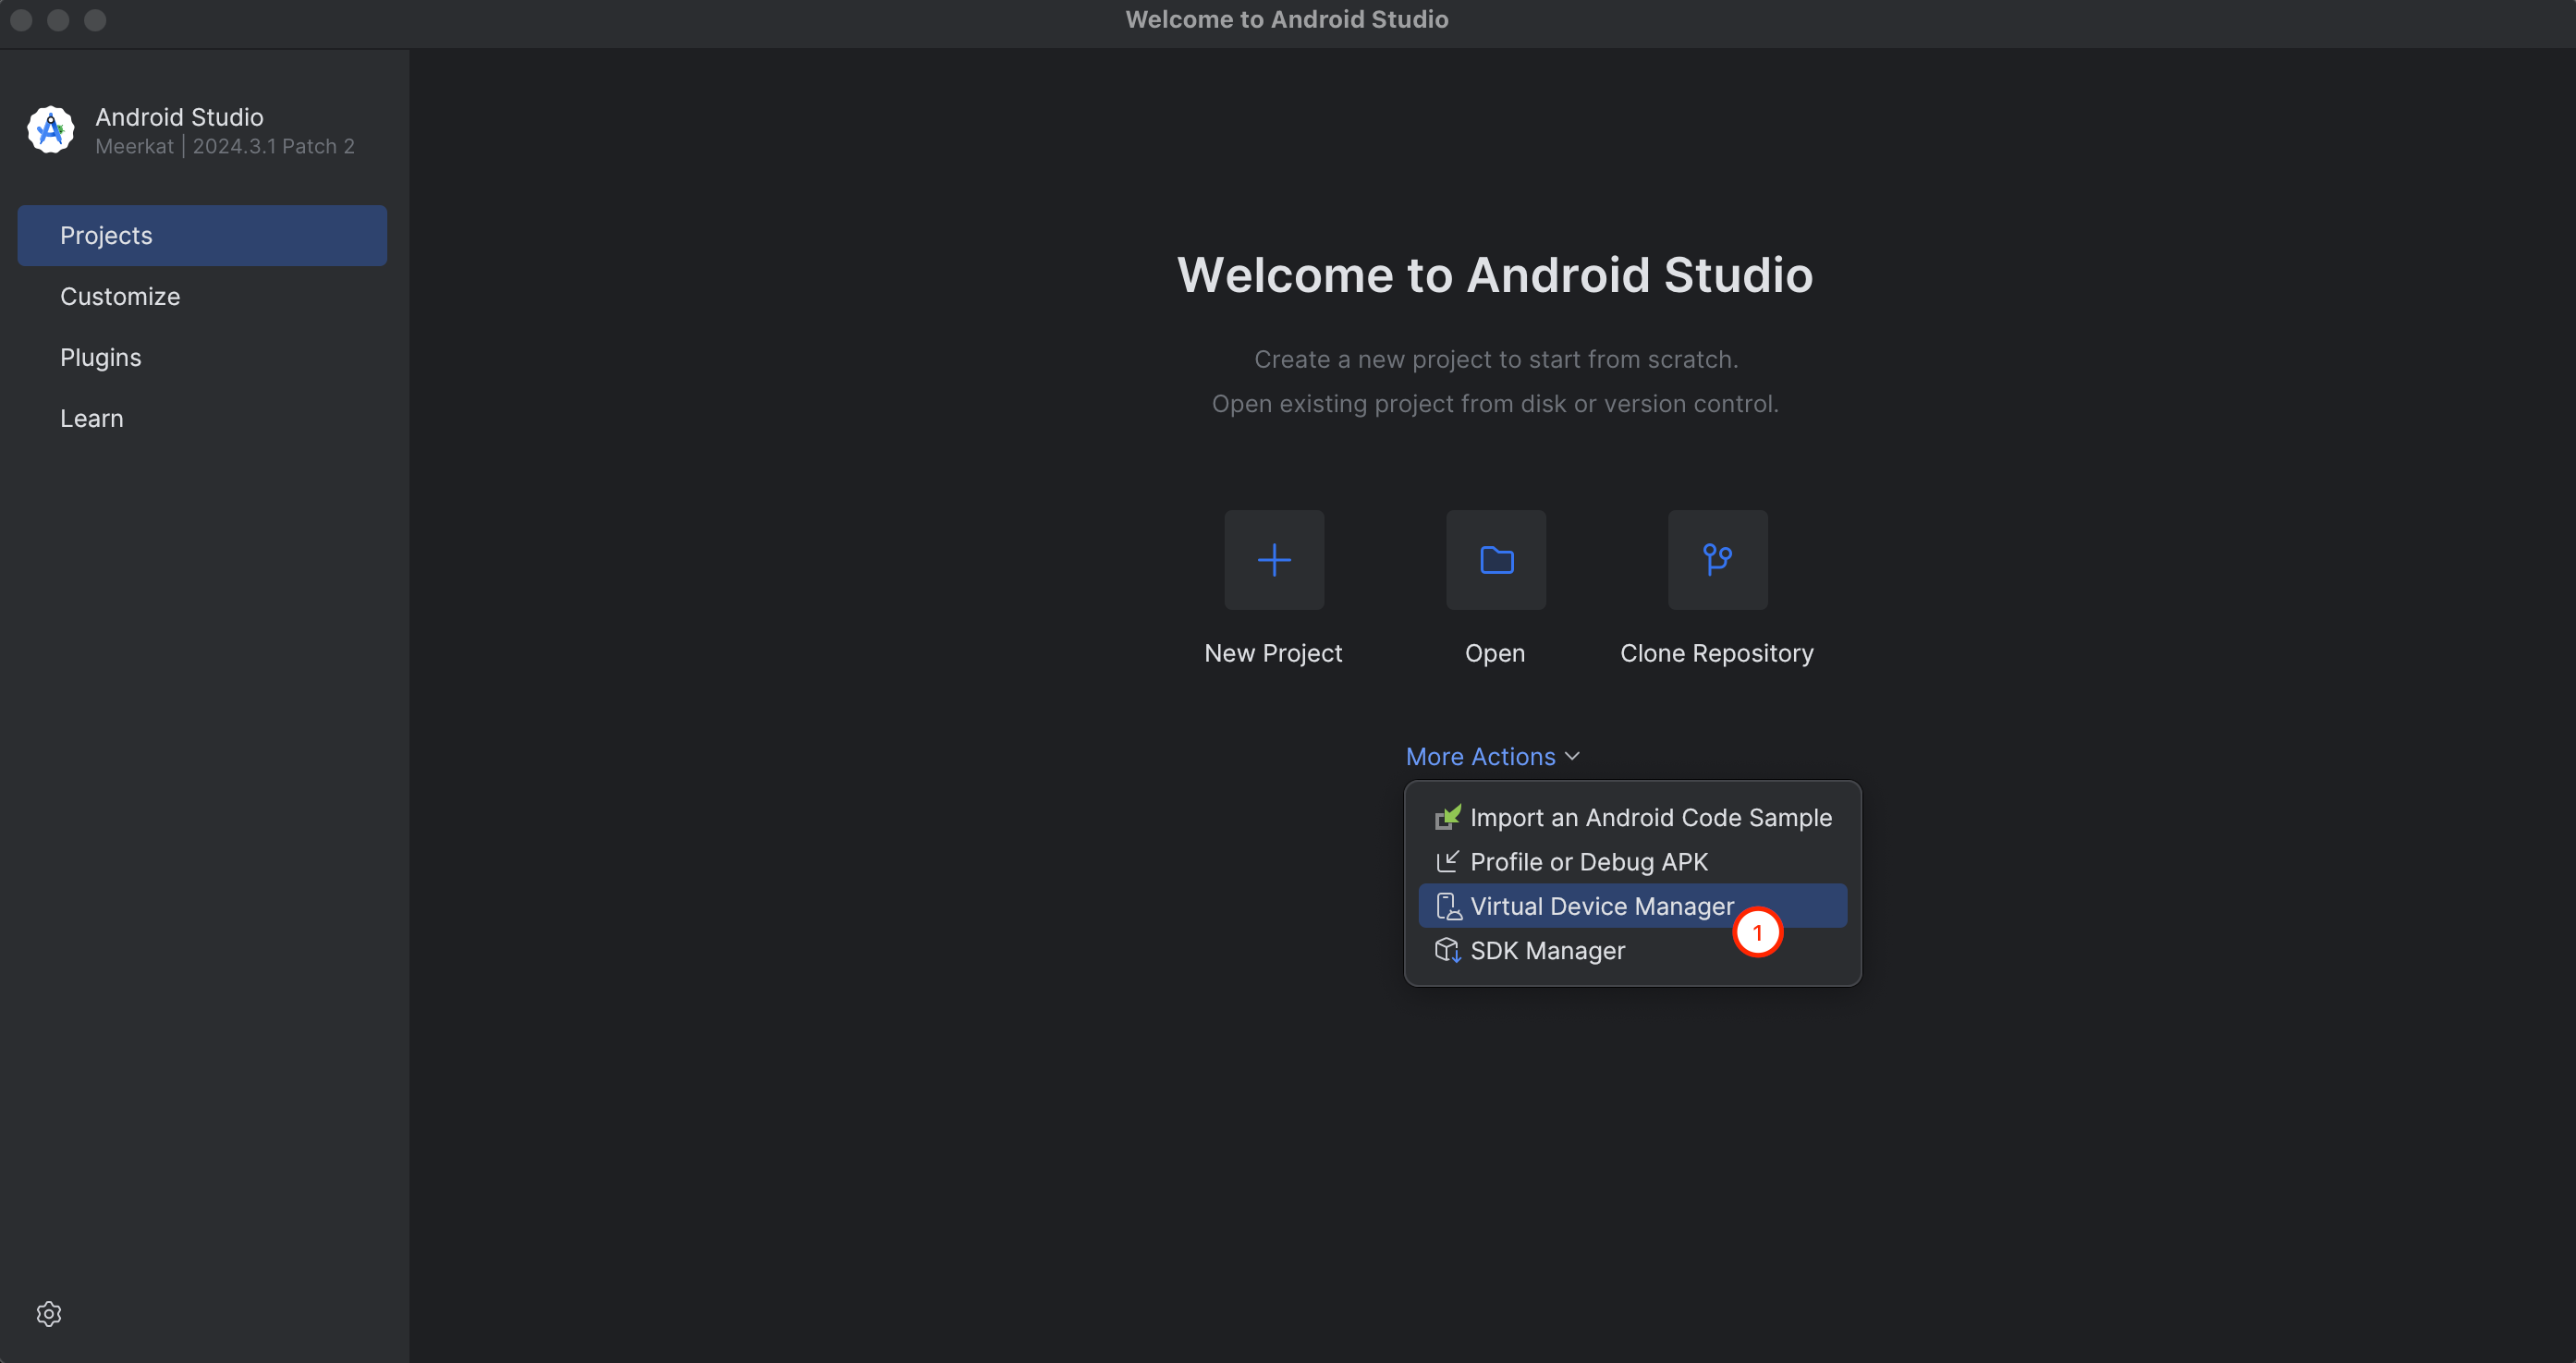
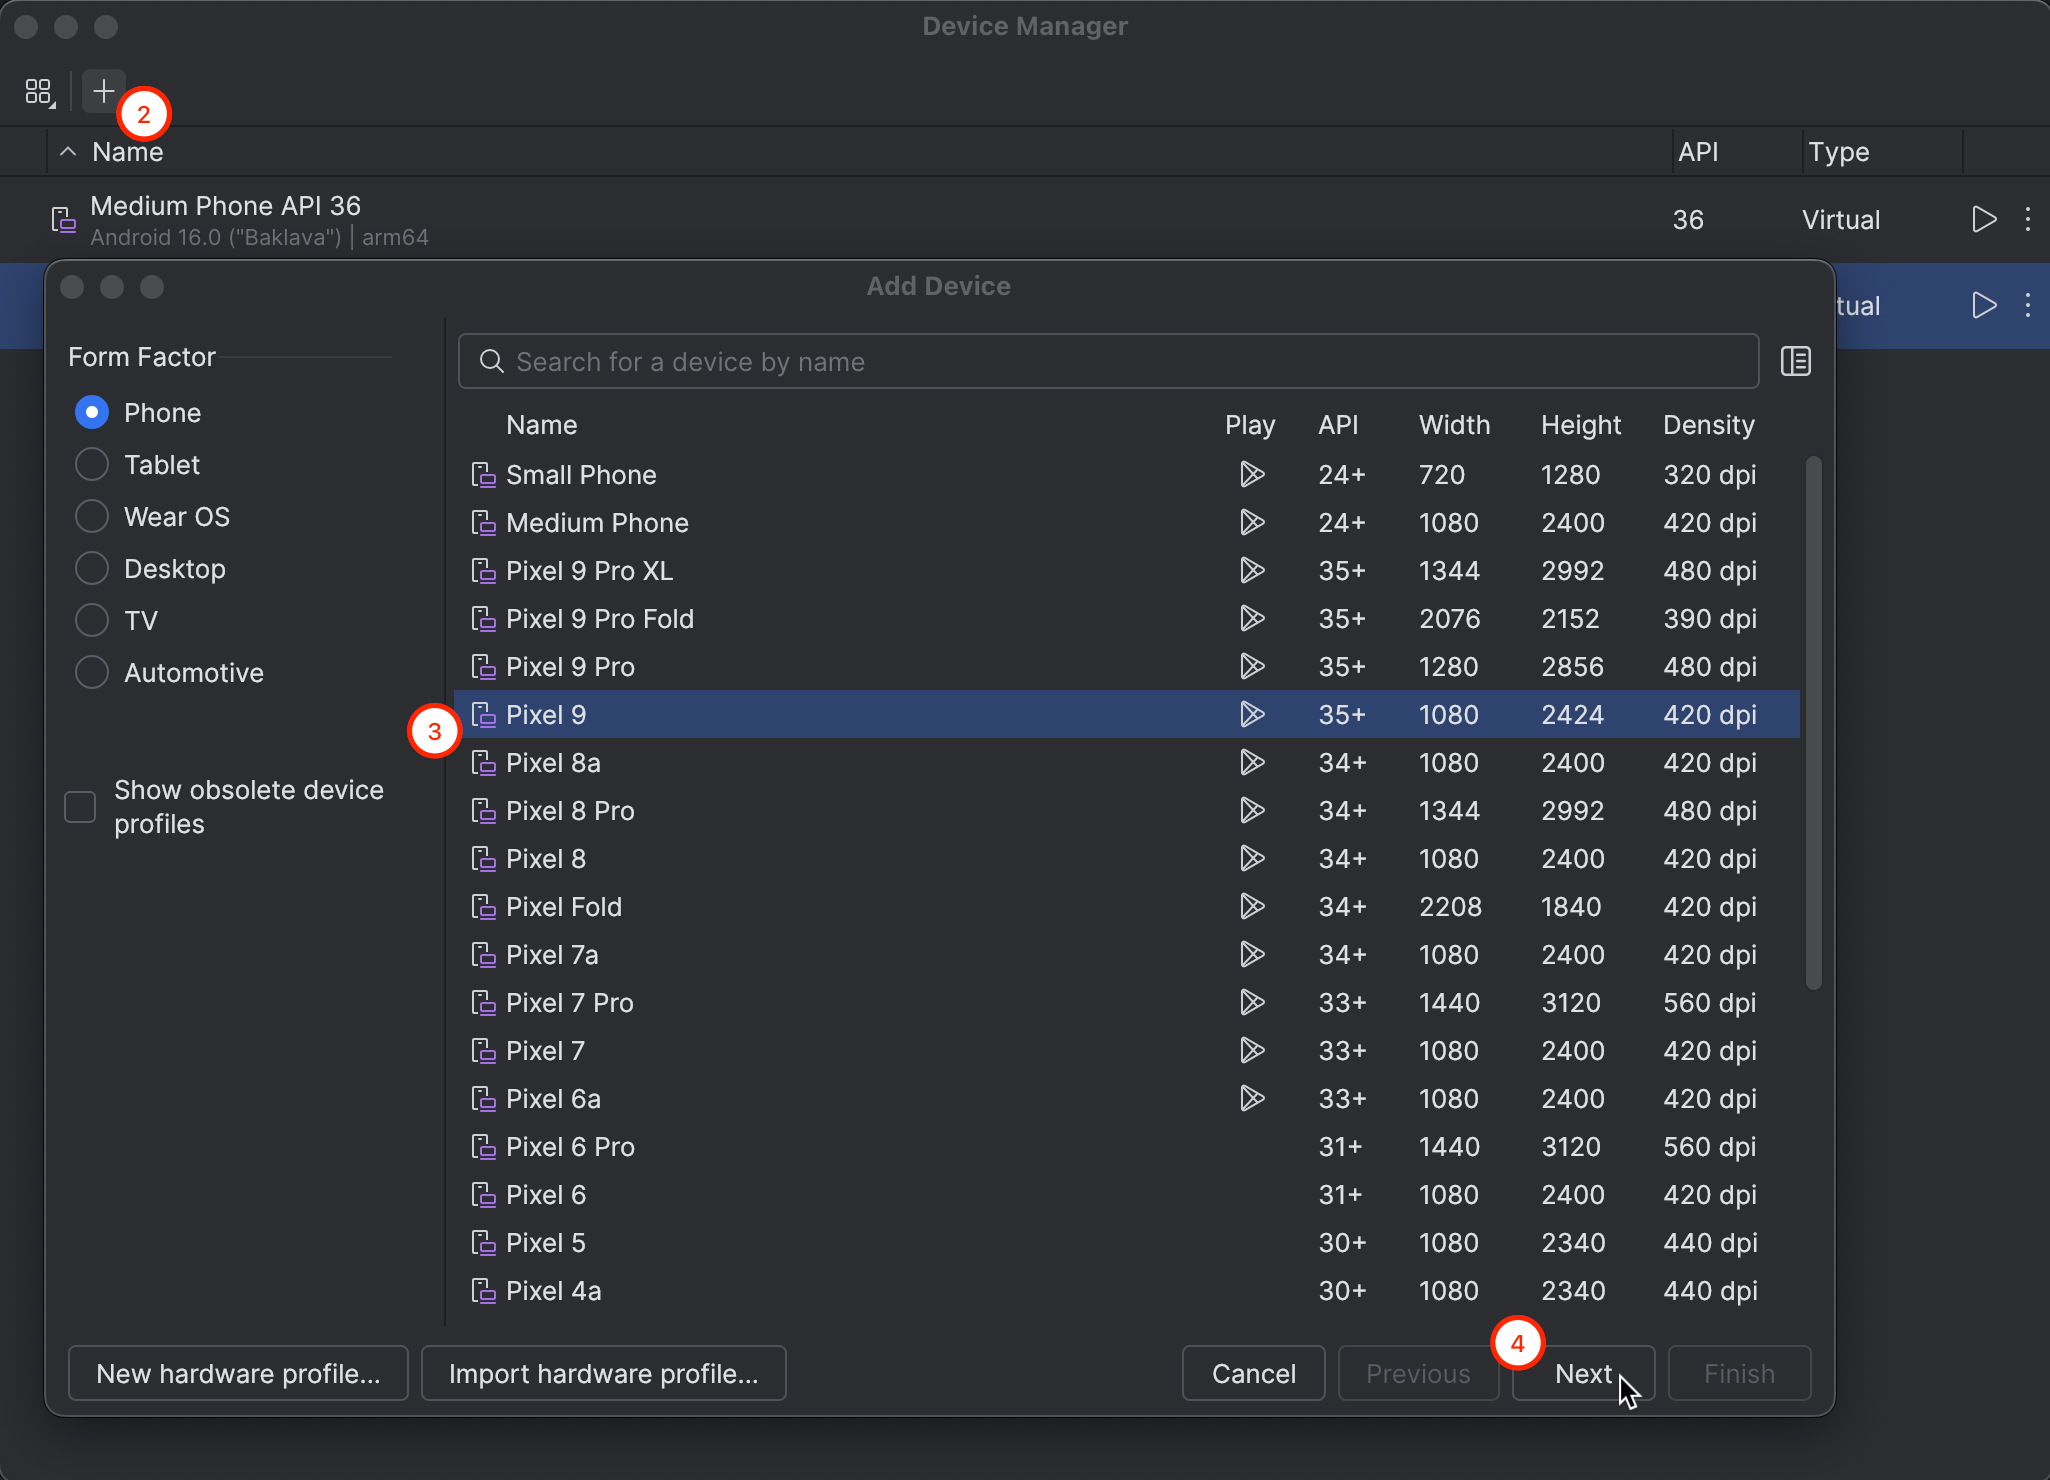
Once Android Studio is installed, open it and launch the Virtual Device Manager. Use it to set up a virtual device that you’ll use for testing.
Add Your API Token and Project Code
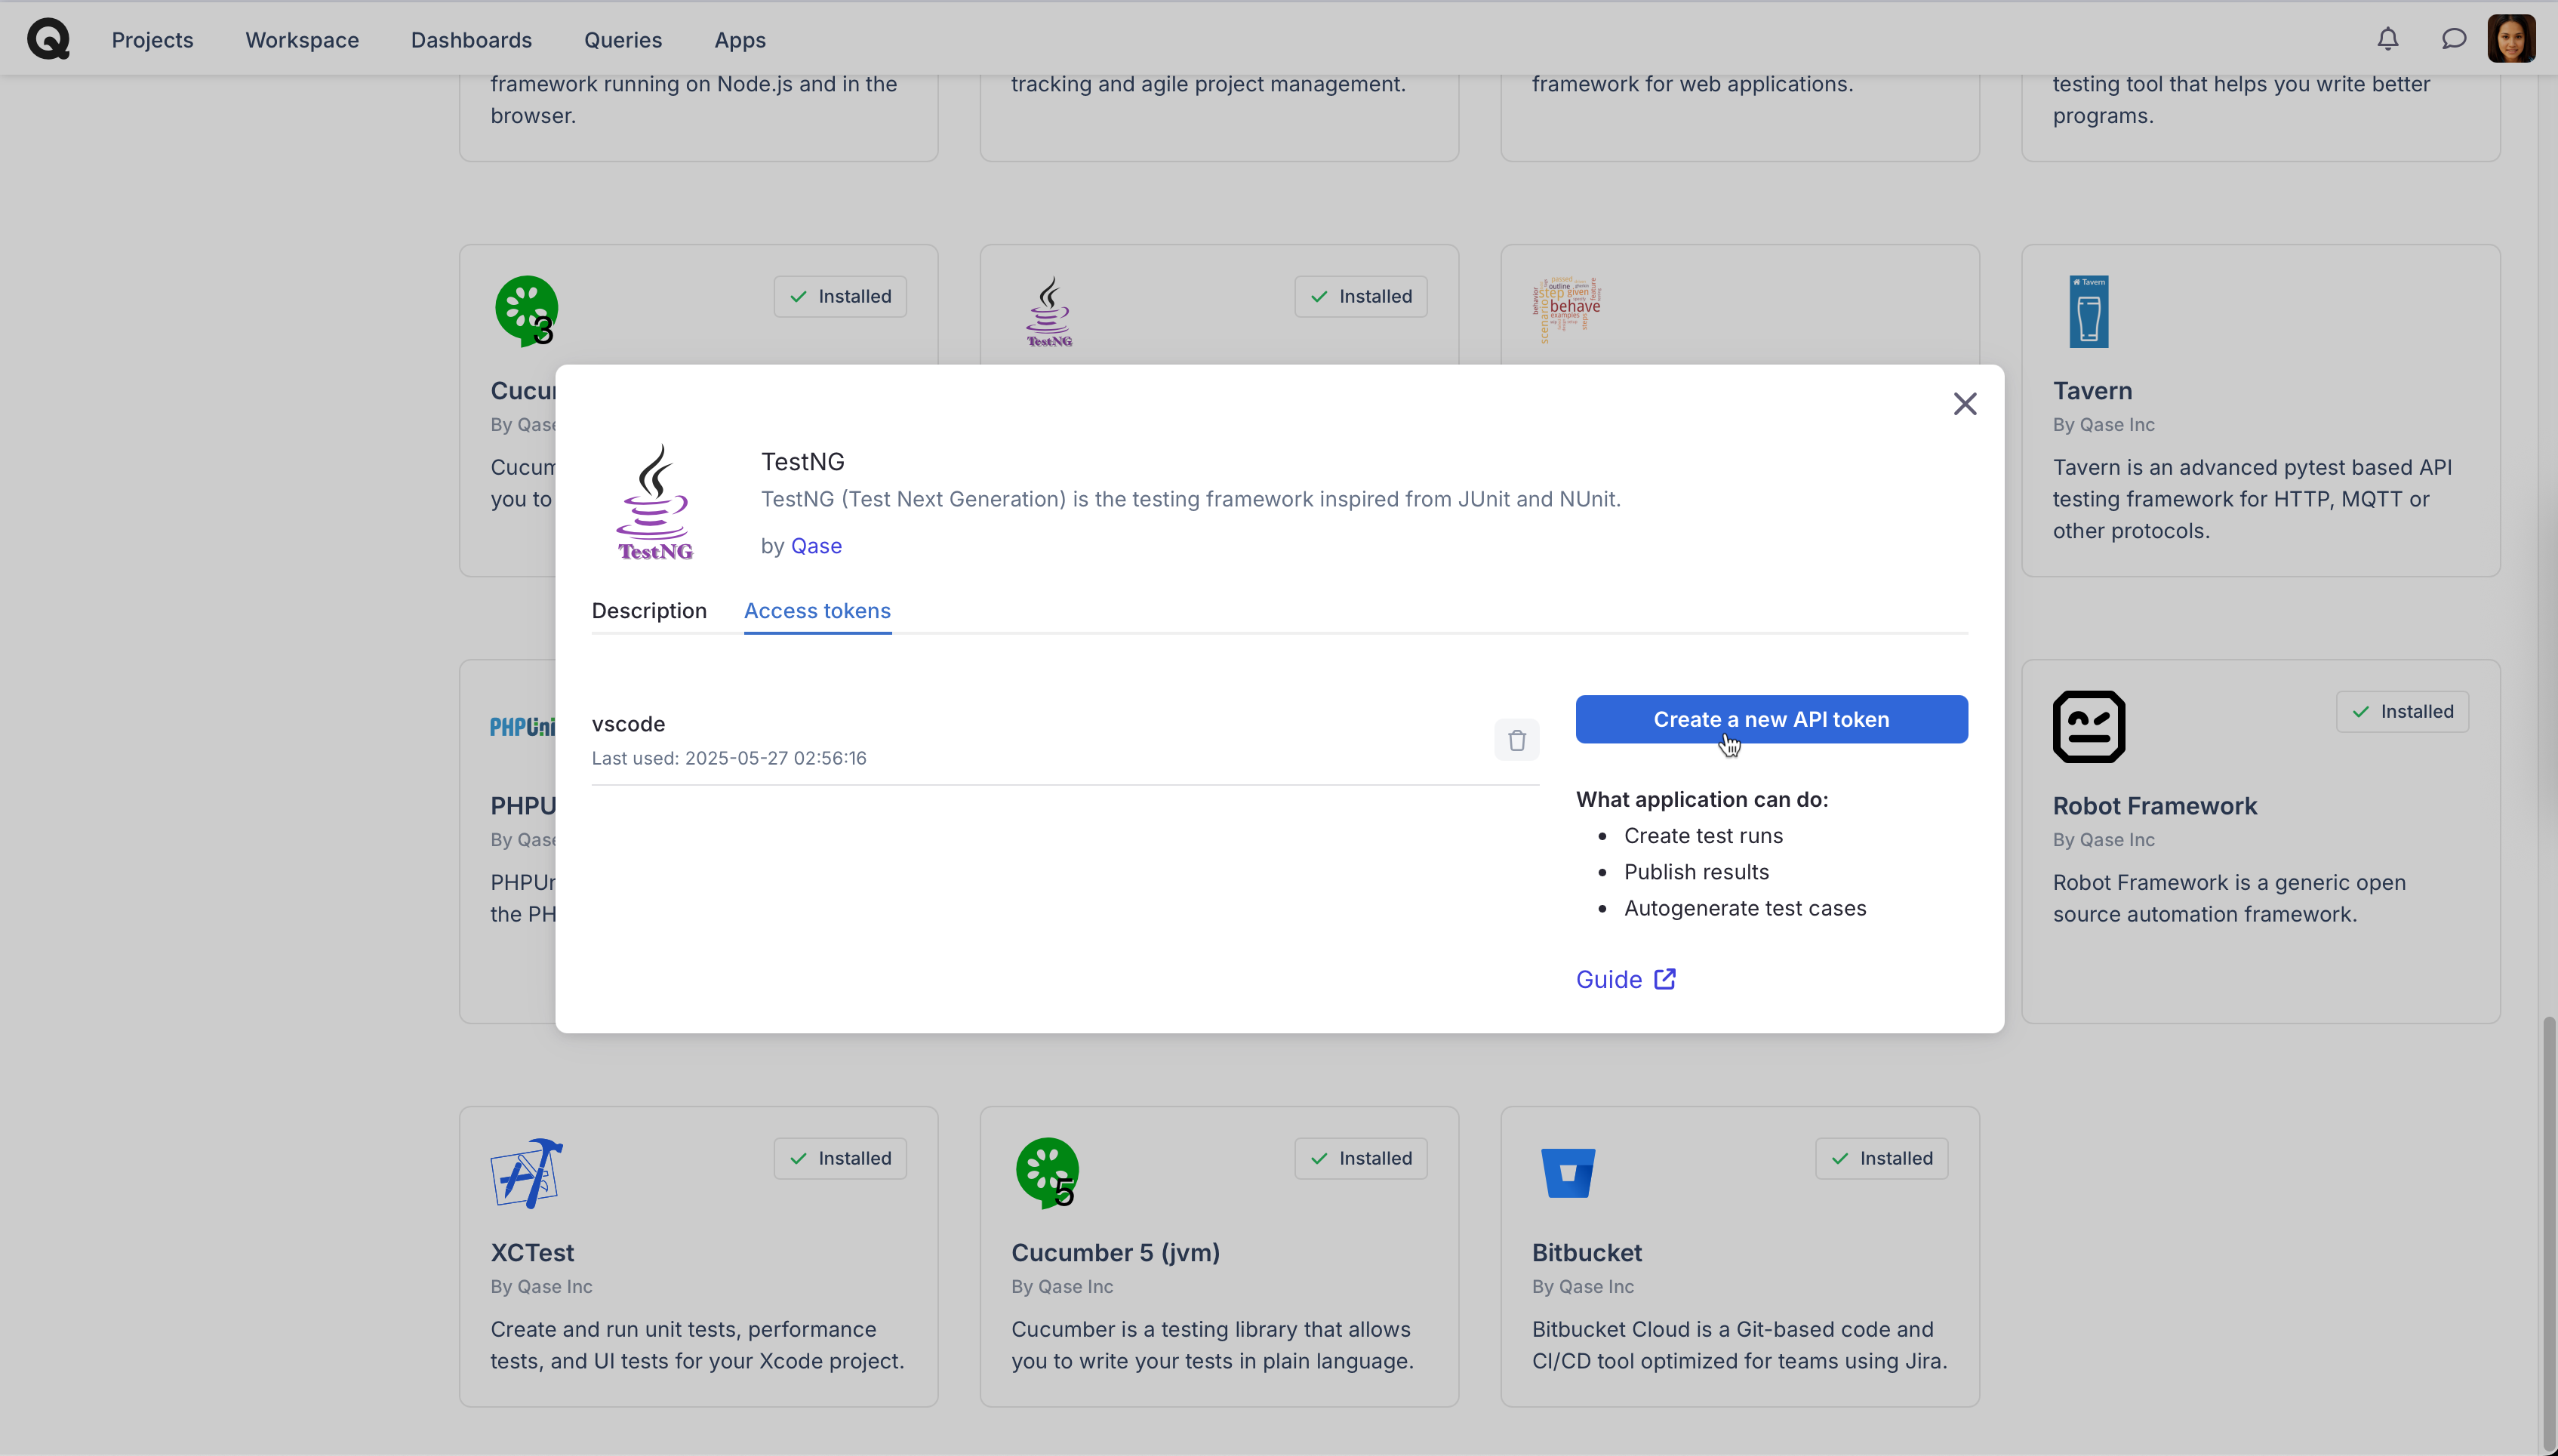
To send results to Qase, you’ll need an API token. In your Qase workspace, head to the Apps section and generate a token from the Access Tokens tab.
Projects in Qase serve as containers for your tests, test runs, and defect reports. You can use a demo project or create a new one, just make sure to keep the project code handy for configuration.
Create a qase.config.json file at your project root with the following contents:
{
  "mode": "testops",
  "debug": true,
  "testops": {
    "api": {
      "token": "your-token-here"
    },
    "project": "your-project-code"
  },
  "usev2": true
}
Replace "your-token-here" and "your-project-code" with your actual token and project code.
Run Your Tests
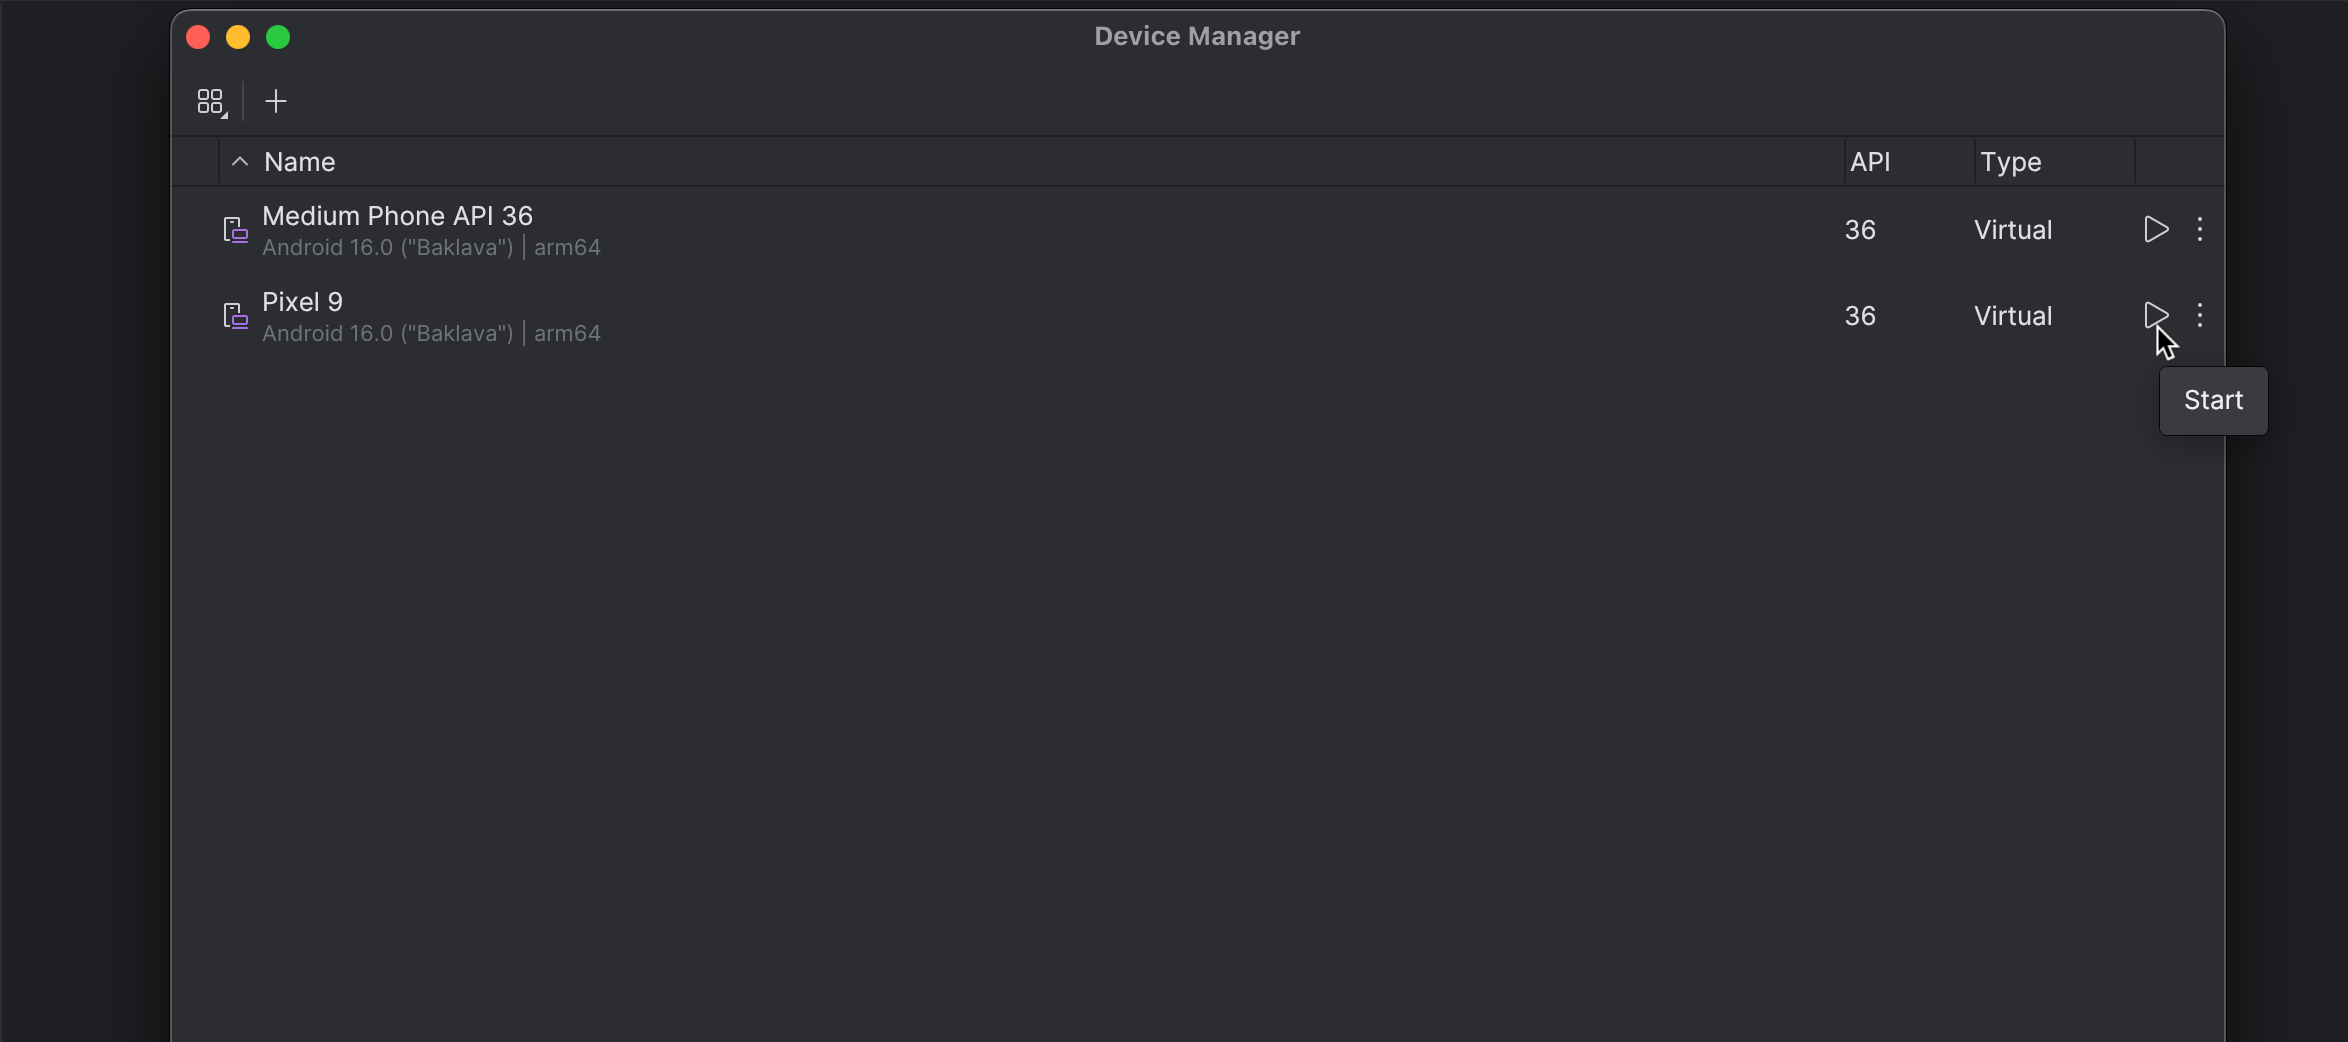
Now you're ready to run the tests. Start the virtual device from Android Studio and run the following command:
mvn clean testView a GIF of what the execution would look like, here.
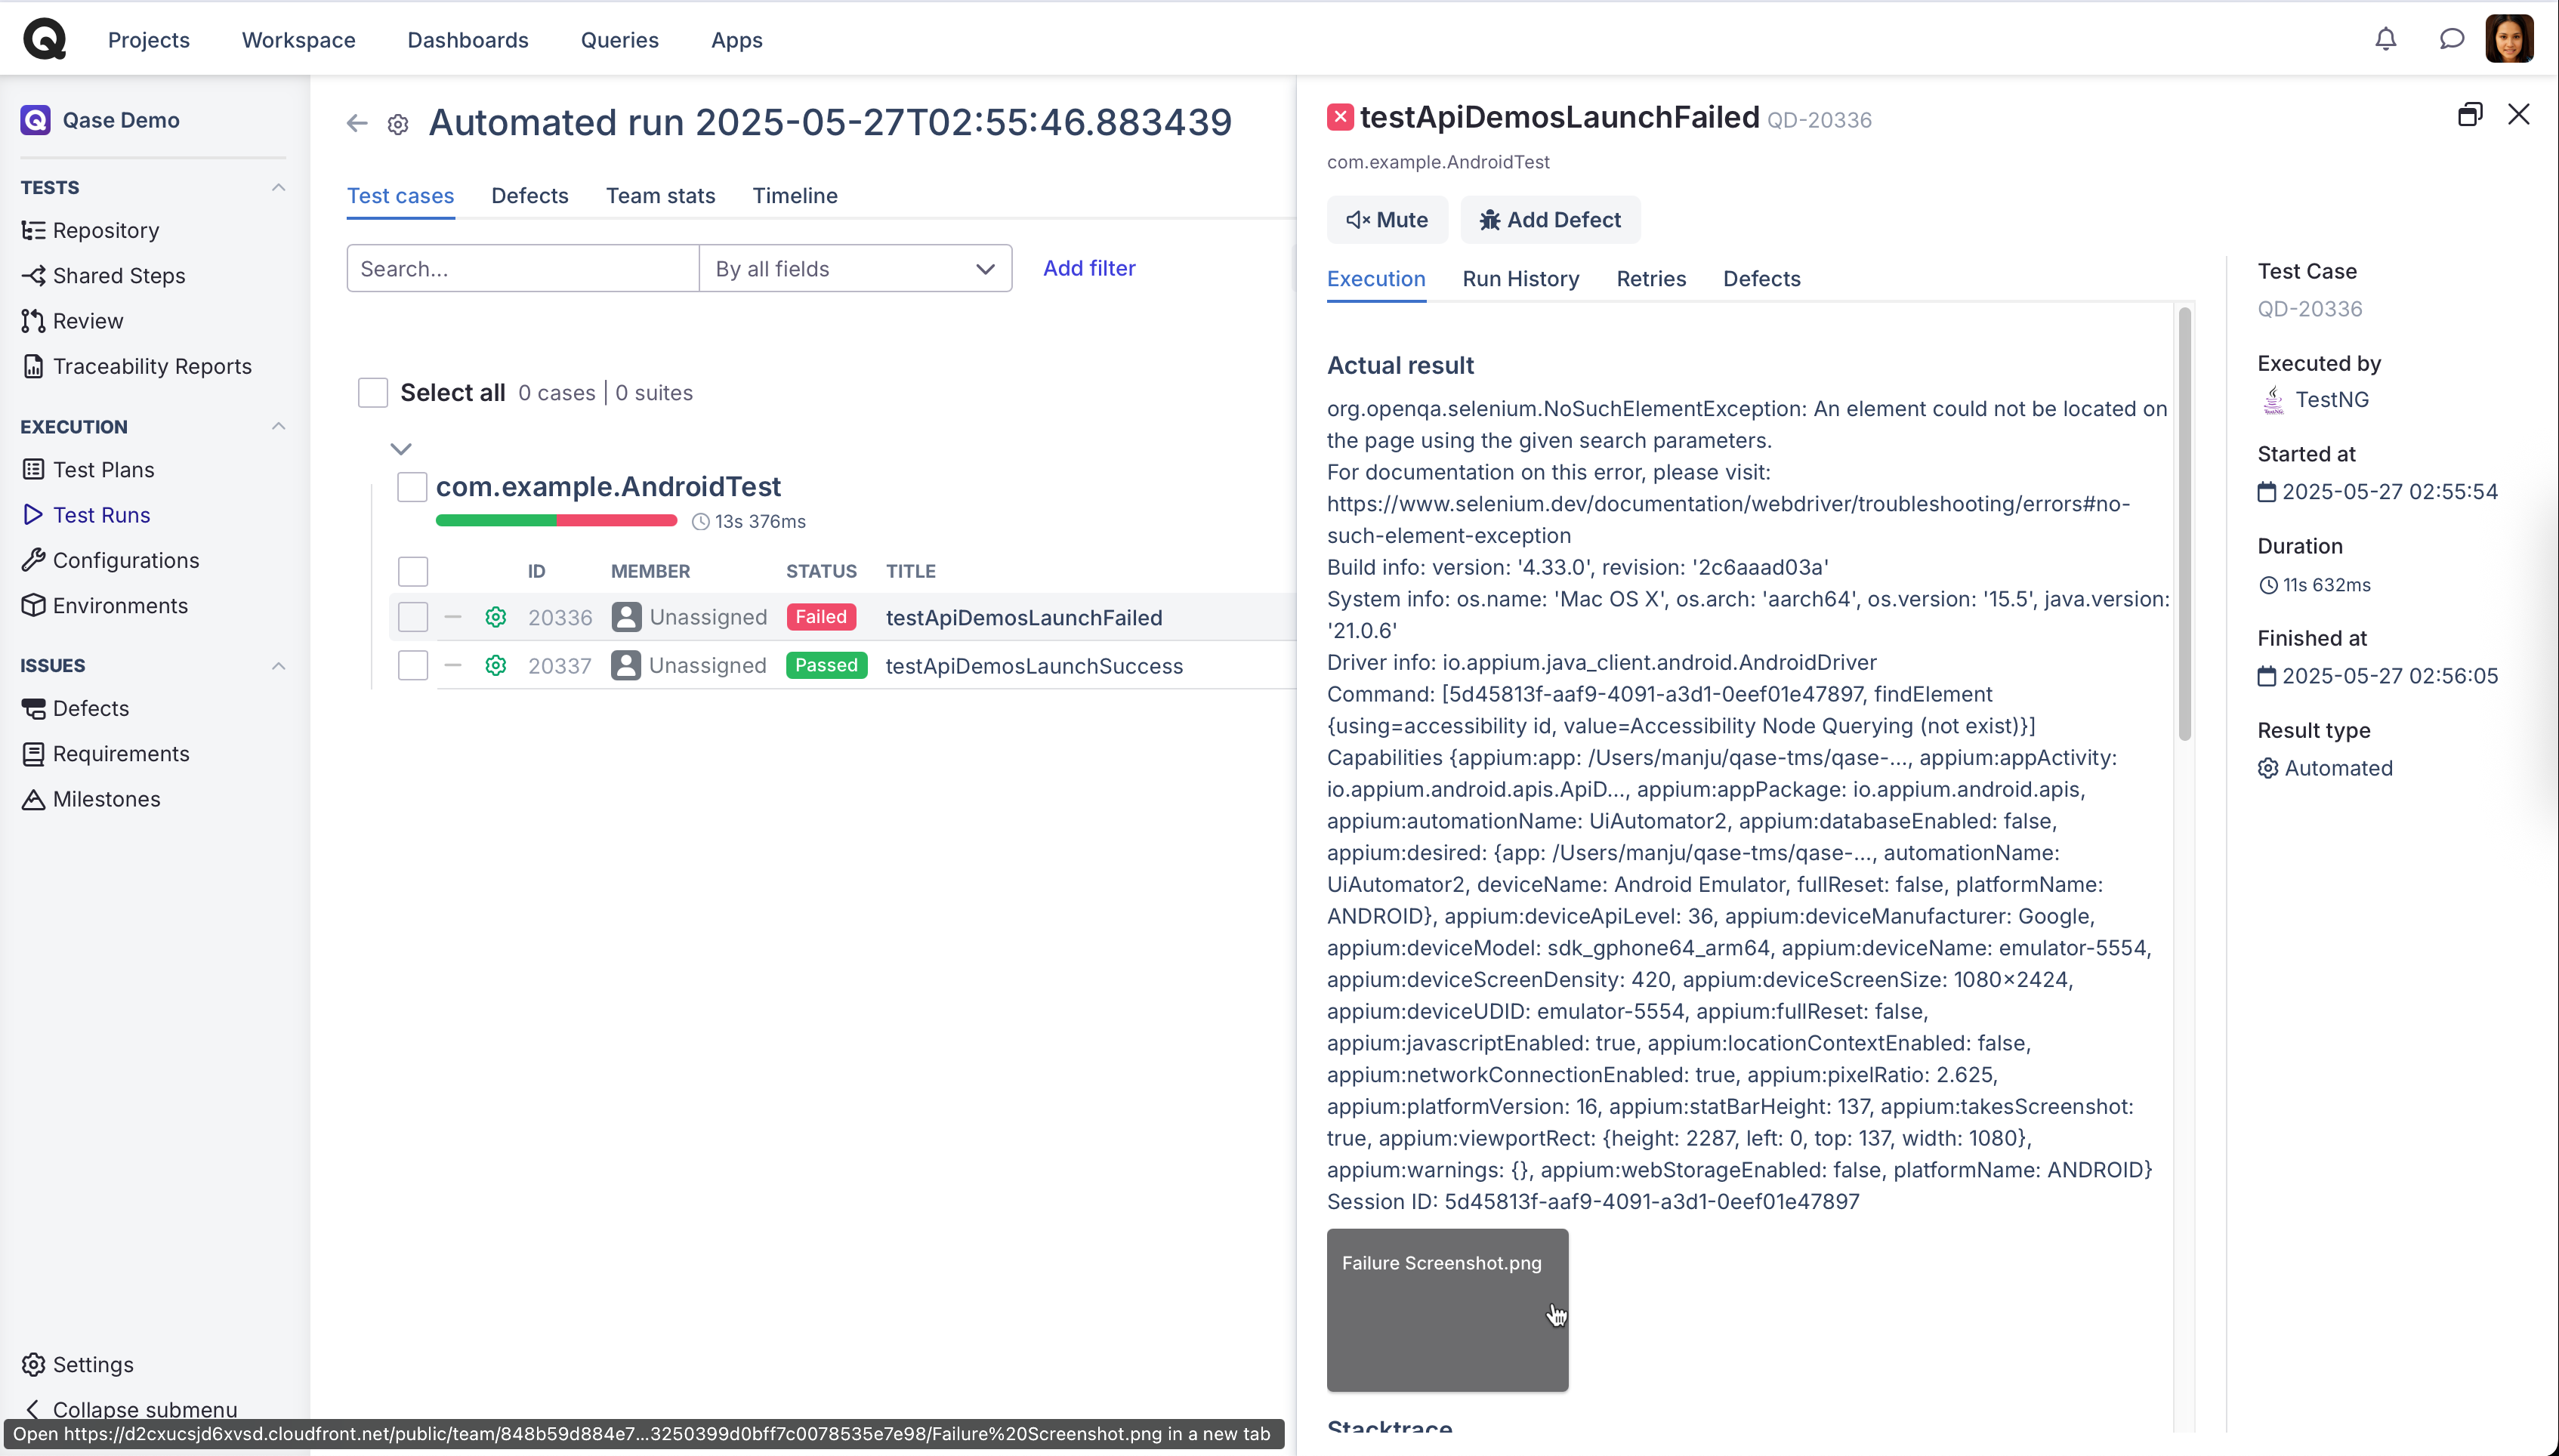
View Results in Qase
Once the test run is complete, head to your Qase dashboard. You should see two results, one passing and one failing. The failing test will include a screenshot, just as we configured.


